Creatures 👹🛴
🛠️ Hardware
May 04, 2019
In this post I will cover the history of developing the hardware solution for my scooter share app.
Related Links:
Hardware repo containing all files used in this post.
Link to video guide for embedded solution coming soon…
😡 Challenges
There are two main challenges that I faced in developing my dock-less scooter hardware, tracking and security. Depending on how completely you want to solve these challenges, will determine the approach you take towards implementing a solution.
Tracking:
- Know where the scooter is at all times, as best I can.
- Tracking is needed, because scooters will need to be picked up for charging, and repairs.
Security:
- To prevent unauthorized access to the scooter.
- Security is needed to deter thieves and general meanies from harming our beloved scooters.
🤔 Solutions
🗺️ Tracking:
I can solve the challenge of tracking though the use of a combination of GPS and a cellular data connection. Below is three methods for tracking, in practice I will be using a combination of two or more of these methods.
📻 Embedded GPS on the scooter
This method uses a device embedded onto the scooter. The device requires at least a GPS module, GPS antenna, and a cellular data connection to upload the scooter’s coordinates to our server.
Pros:
- Tracking is physically bound to the scooter.
- Can track even if the scooter is moved when locked.
- Most accurate form of tracking.
Cons:
- Most expensive.
- Largest hardware requirement.
- Requires GPS signal to work.
📱 User’s phone GPS
Via the HTML Geolocation API I can request the location of our users. The idea is that I would start tracking once a scooter is checked out and stop once the ride ends.
Pros:
- Free.
- No requirements for additional scooter hardware.
- The Geolocation API also uses WiFi and IP based locating if GPS signal is not available.
Cons:
- Relies on user’s cellular connection, which may be unreliable.
- Use of a VPN may prevent accurate tracking.
- Assumes that the phone which unlocked the scooter is within close proximity to the scooter during the entire ride… which is not necessarily true.
📶 Triangulation of Cell Towers:
A device which has a cellular connection can preform a rudimentary form of tracking by triangulating it’s location in relation to nearby cell towers.
Pros:
- Mild hardware requirements.
- Works in areas that do not have a GPS signal e.g. indoors.
Cons:
- Tracking is not very accurate.
- Still requires a device with a cellular connection.
👮♀️ Security:
There are two methods for hopefully keeping the scooters a bit safer.
🚨 Alarm
I want my device to be able to ask and answer this question, Is someone riding me or moving me without permission? The first requirement to answering this question is that my scooter needs to be able to detect motion.
Some methods to detect motion:
- Embedded accelerometer - detect acceleration.
- Changes in location via GPS.
- Magnetometer - digital compass, detecting changes in direction.
- Use a simple shake switch to detect vibrations.
- Detect if our scooter’s wheels are moving.
Once the device has detected motion, it will check its lock status, if unlocked do nothing, otherwise sound an alarm.
🔒 Locking
I will lock my scooter by disabling the throttle, in affect acting as a remote kill switch. For this to work, my scooter will have an embedded micro controller which will connect to the throttle of the scooter, and control access to it.
There are several methods that I can provide for a user to unlock the scooter:
-
Unlock via web app
- Easiest for a user to use.
- Requires active cell connection for our scooter’s hardware.
-
Keypad Unlocking - Turning throttle on or off via keypad on scooter, user would have to enter an unlock code generated by our web app.
- Does not require Cell Connection on scooter.
- Would require code to keep security keys in sync on the server and scooter hardware.
-
BLE Unlocking - Turning throttle on or off via bluetooth, in effect I would use the user’s bluetooth connection on their phone to control the throttle on the scooter.
- Requires a scooter with a cracked BLE protocol.
- In order to use a customer’s Bluetooth connection, I would need to develop native apps, IOS or Andriod. There is a web bluetooth api, however it is not fully supported yet.
🙂 Implementation
Now that I have my solutions researched, how can I implement the solutions in practice? In the end I came up with two separate hardware solutions,
- A quick and dirty option, that utilizes a cell phone, and minimal effort.
- And a more robust option in which I put together a custom embedded device.
The minimal effort option.
The beauty of this option is that you probably already own all the required hardware to test it out. All you will need is a cell phone, preferably one you would not mind losing. Modern cell phones are incredible devices, and they contain a multitude of sensors and processing capacity. Specifically phones provide a lot of the hardware capabilities that I am interested in for my scooter.
| Phone Hardware | Specific Requirement | Project Feature |
|---|---|---|
| GPS radio | Location tracking | Tracking - Embedded |
| Cellular connection | Data Transfer | Tracking & Security |
| Battery | Remote Operation | Tracking & Security |
| Processor | Handling App Logic | Tracking & Security |
| Speakers | Alarm | Security - Alarm |
| Accelerometers | Detecting motion | Security - Alarm |
One requirement you will not see in the table above is locking.
I can approach the locking issue in one of several ways:
- Leave it out, who cares, the scooter will still have the alarm go off if someone does not unlock it.
- Add another device controlled by the phone (Arudino, raspberry pi, etc)
- BLE locking, with a lot of the electric scooters on the market you can connect to them via bluetooth and control the throttle via an app.
After some research, I ultimately chose that I wanted to go down the route of adding another device in addition to the cell phone. figure out the locking capability. I will be using the ever popular ESP8266. I chose the ESP8266 because it is, cheap, popular, and includes WiFi connectivity.
⚙️ Hardware Requirements
-
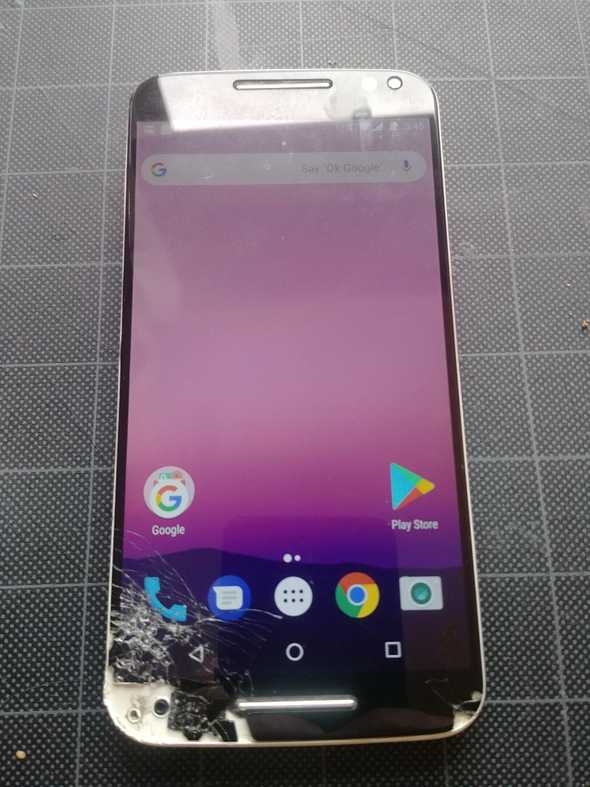
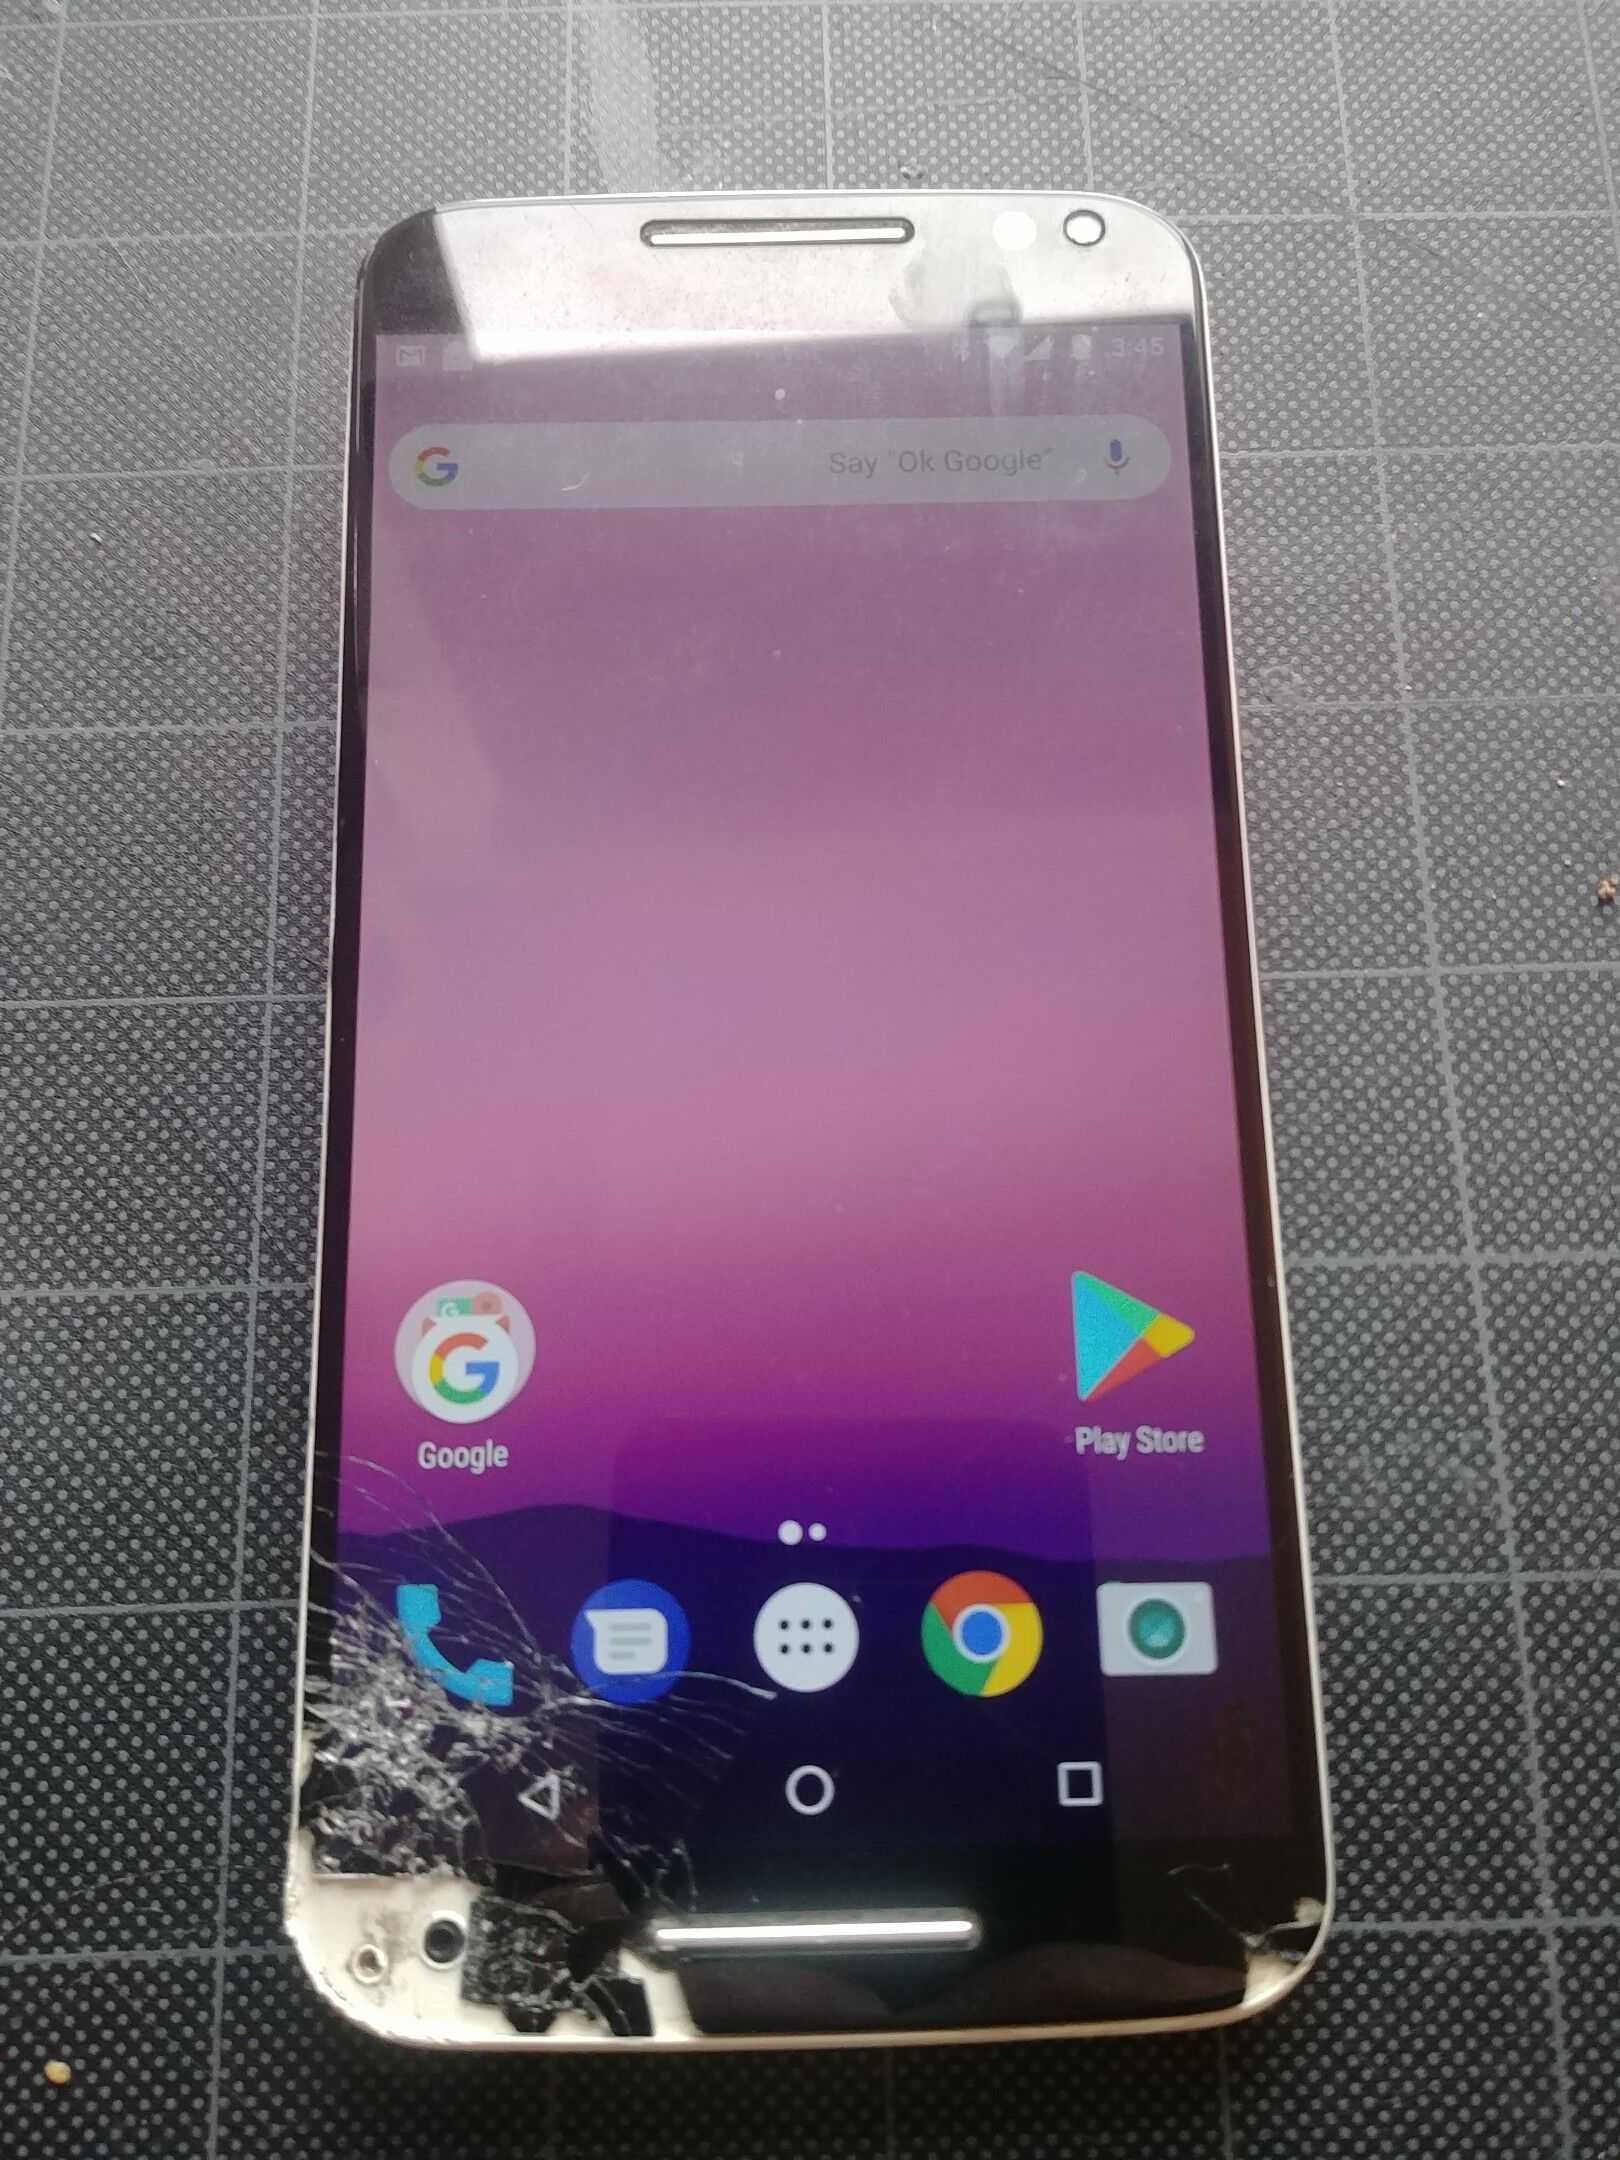
Old, used Android phone, or cheap new one.
- For me, I am using an old busted moto x pure, the screen mostly works, and the battery life is crap, but it is good enough for testing.
- For me, I am using an old busted moto x pure, the screen mostly works, and the battery life is crap, but it is good enough for testing.
-
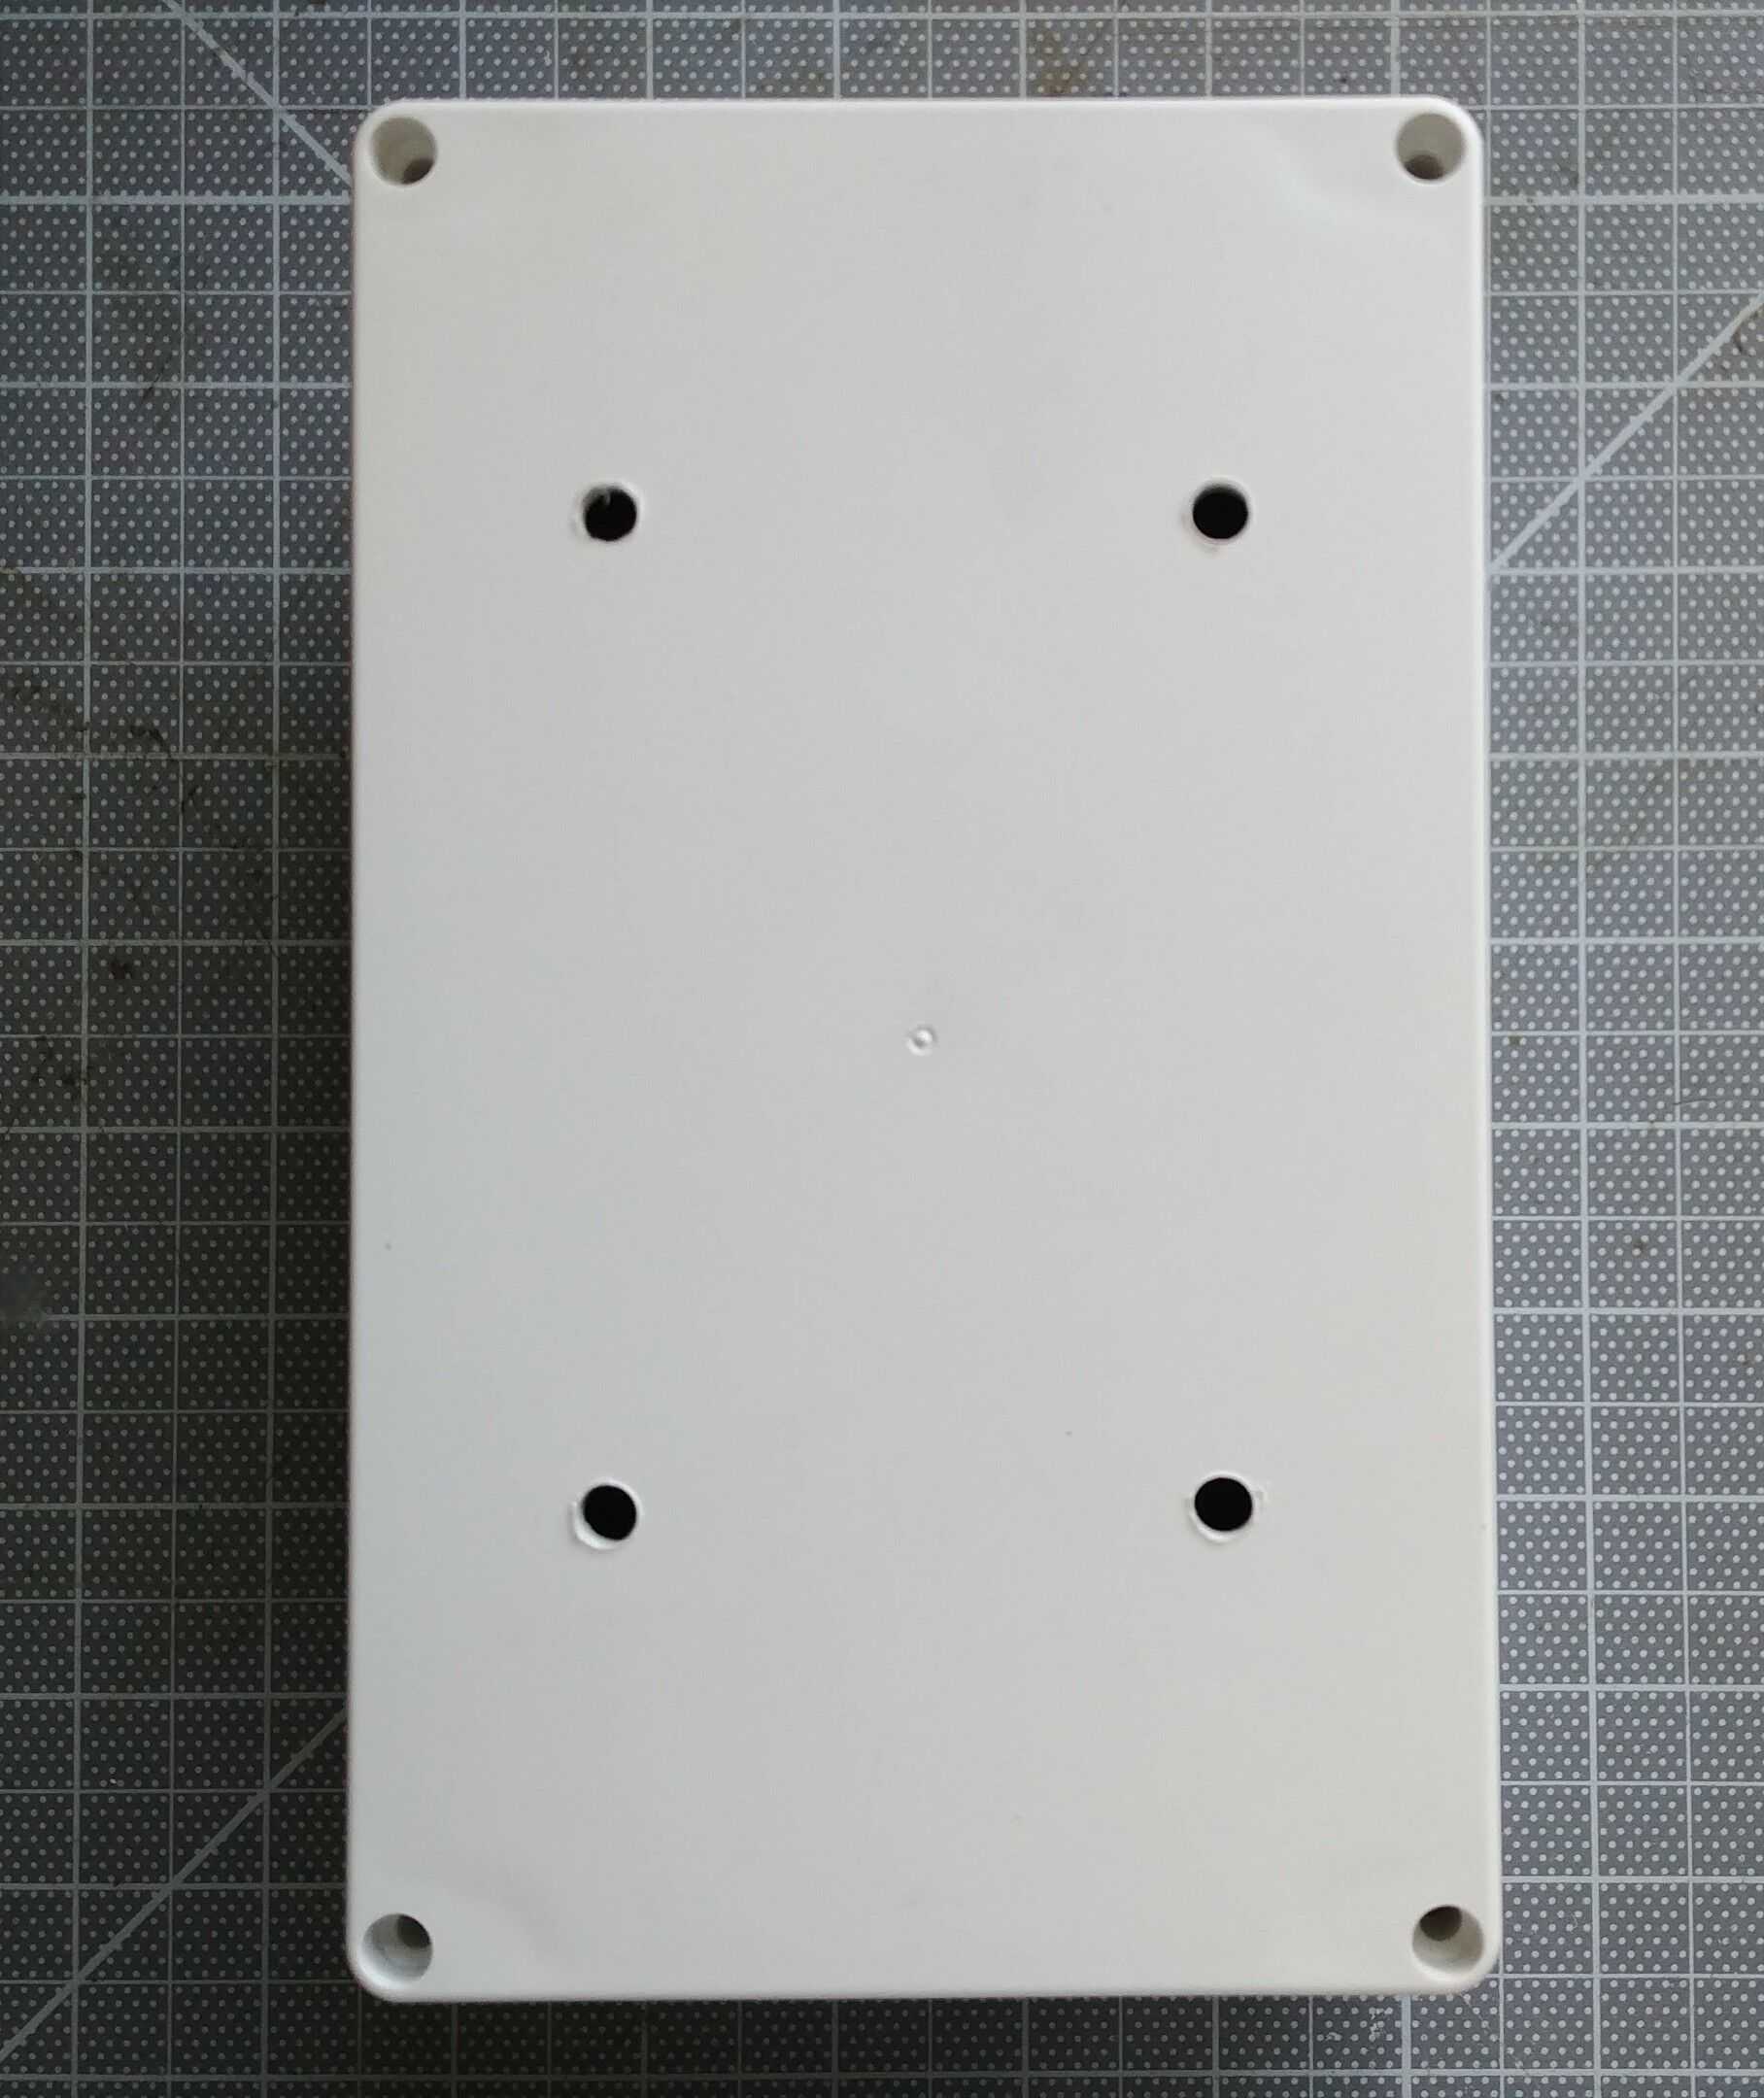
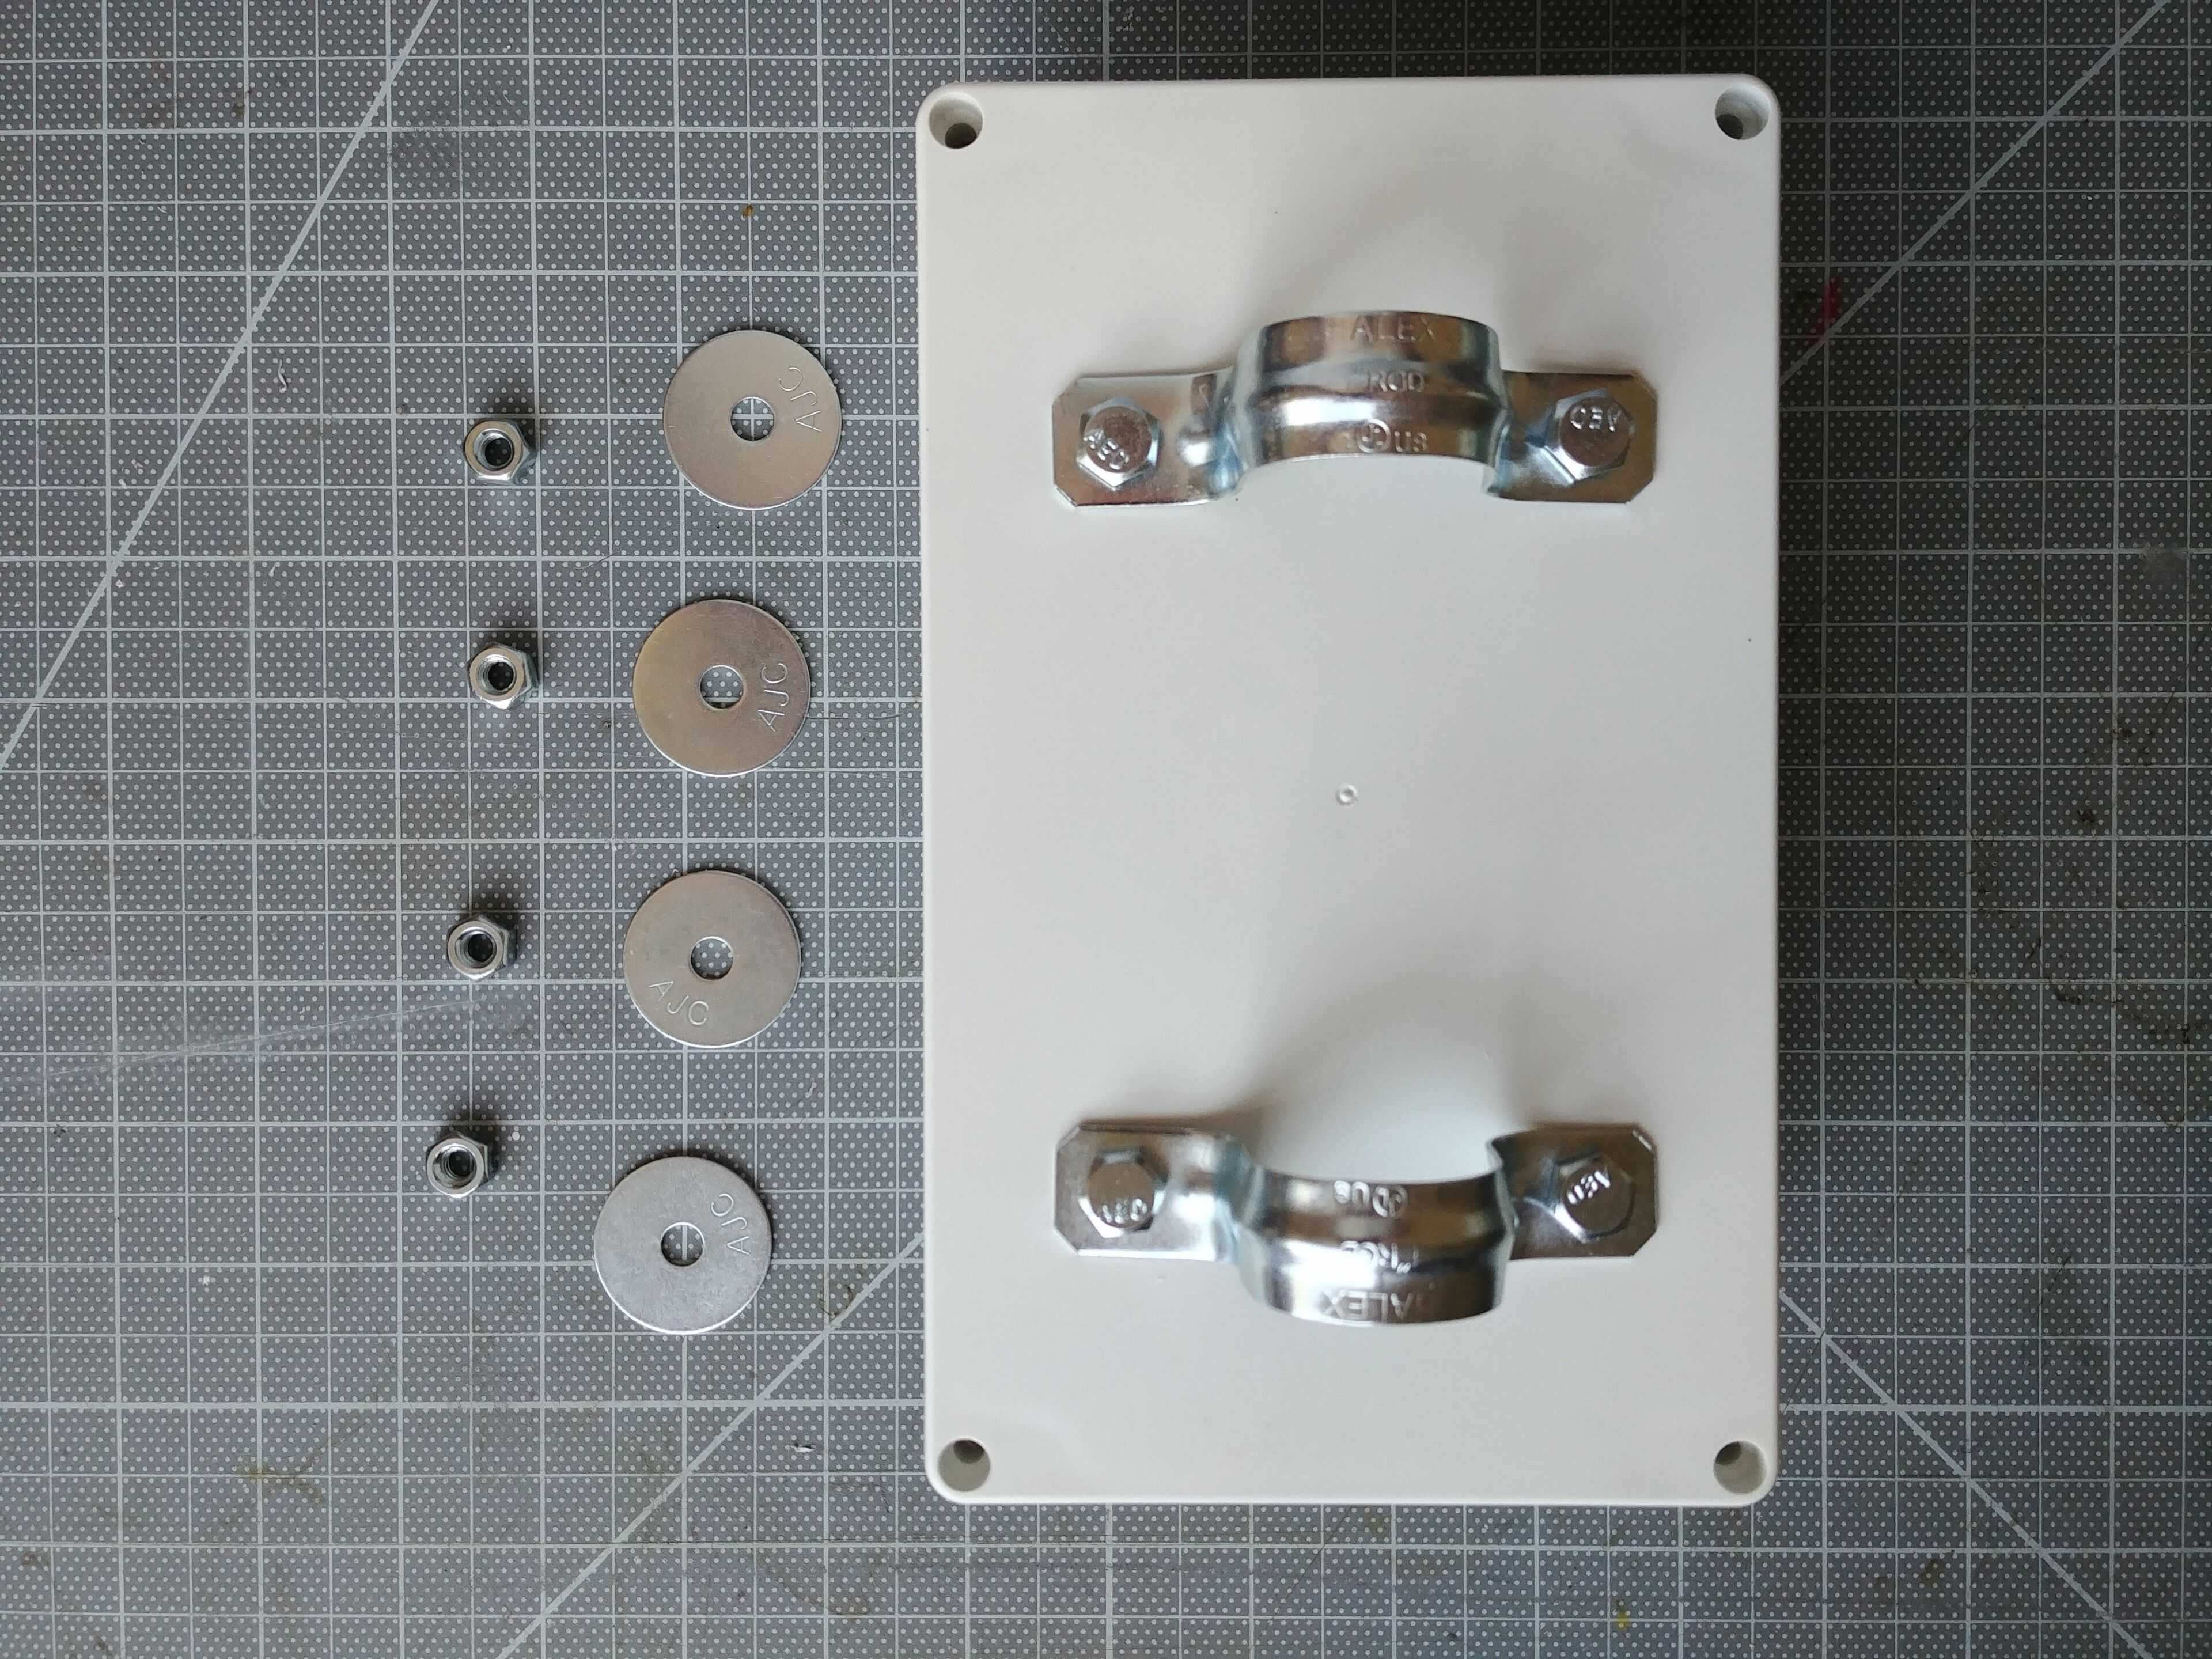
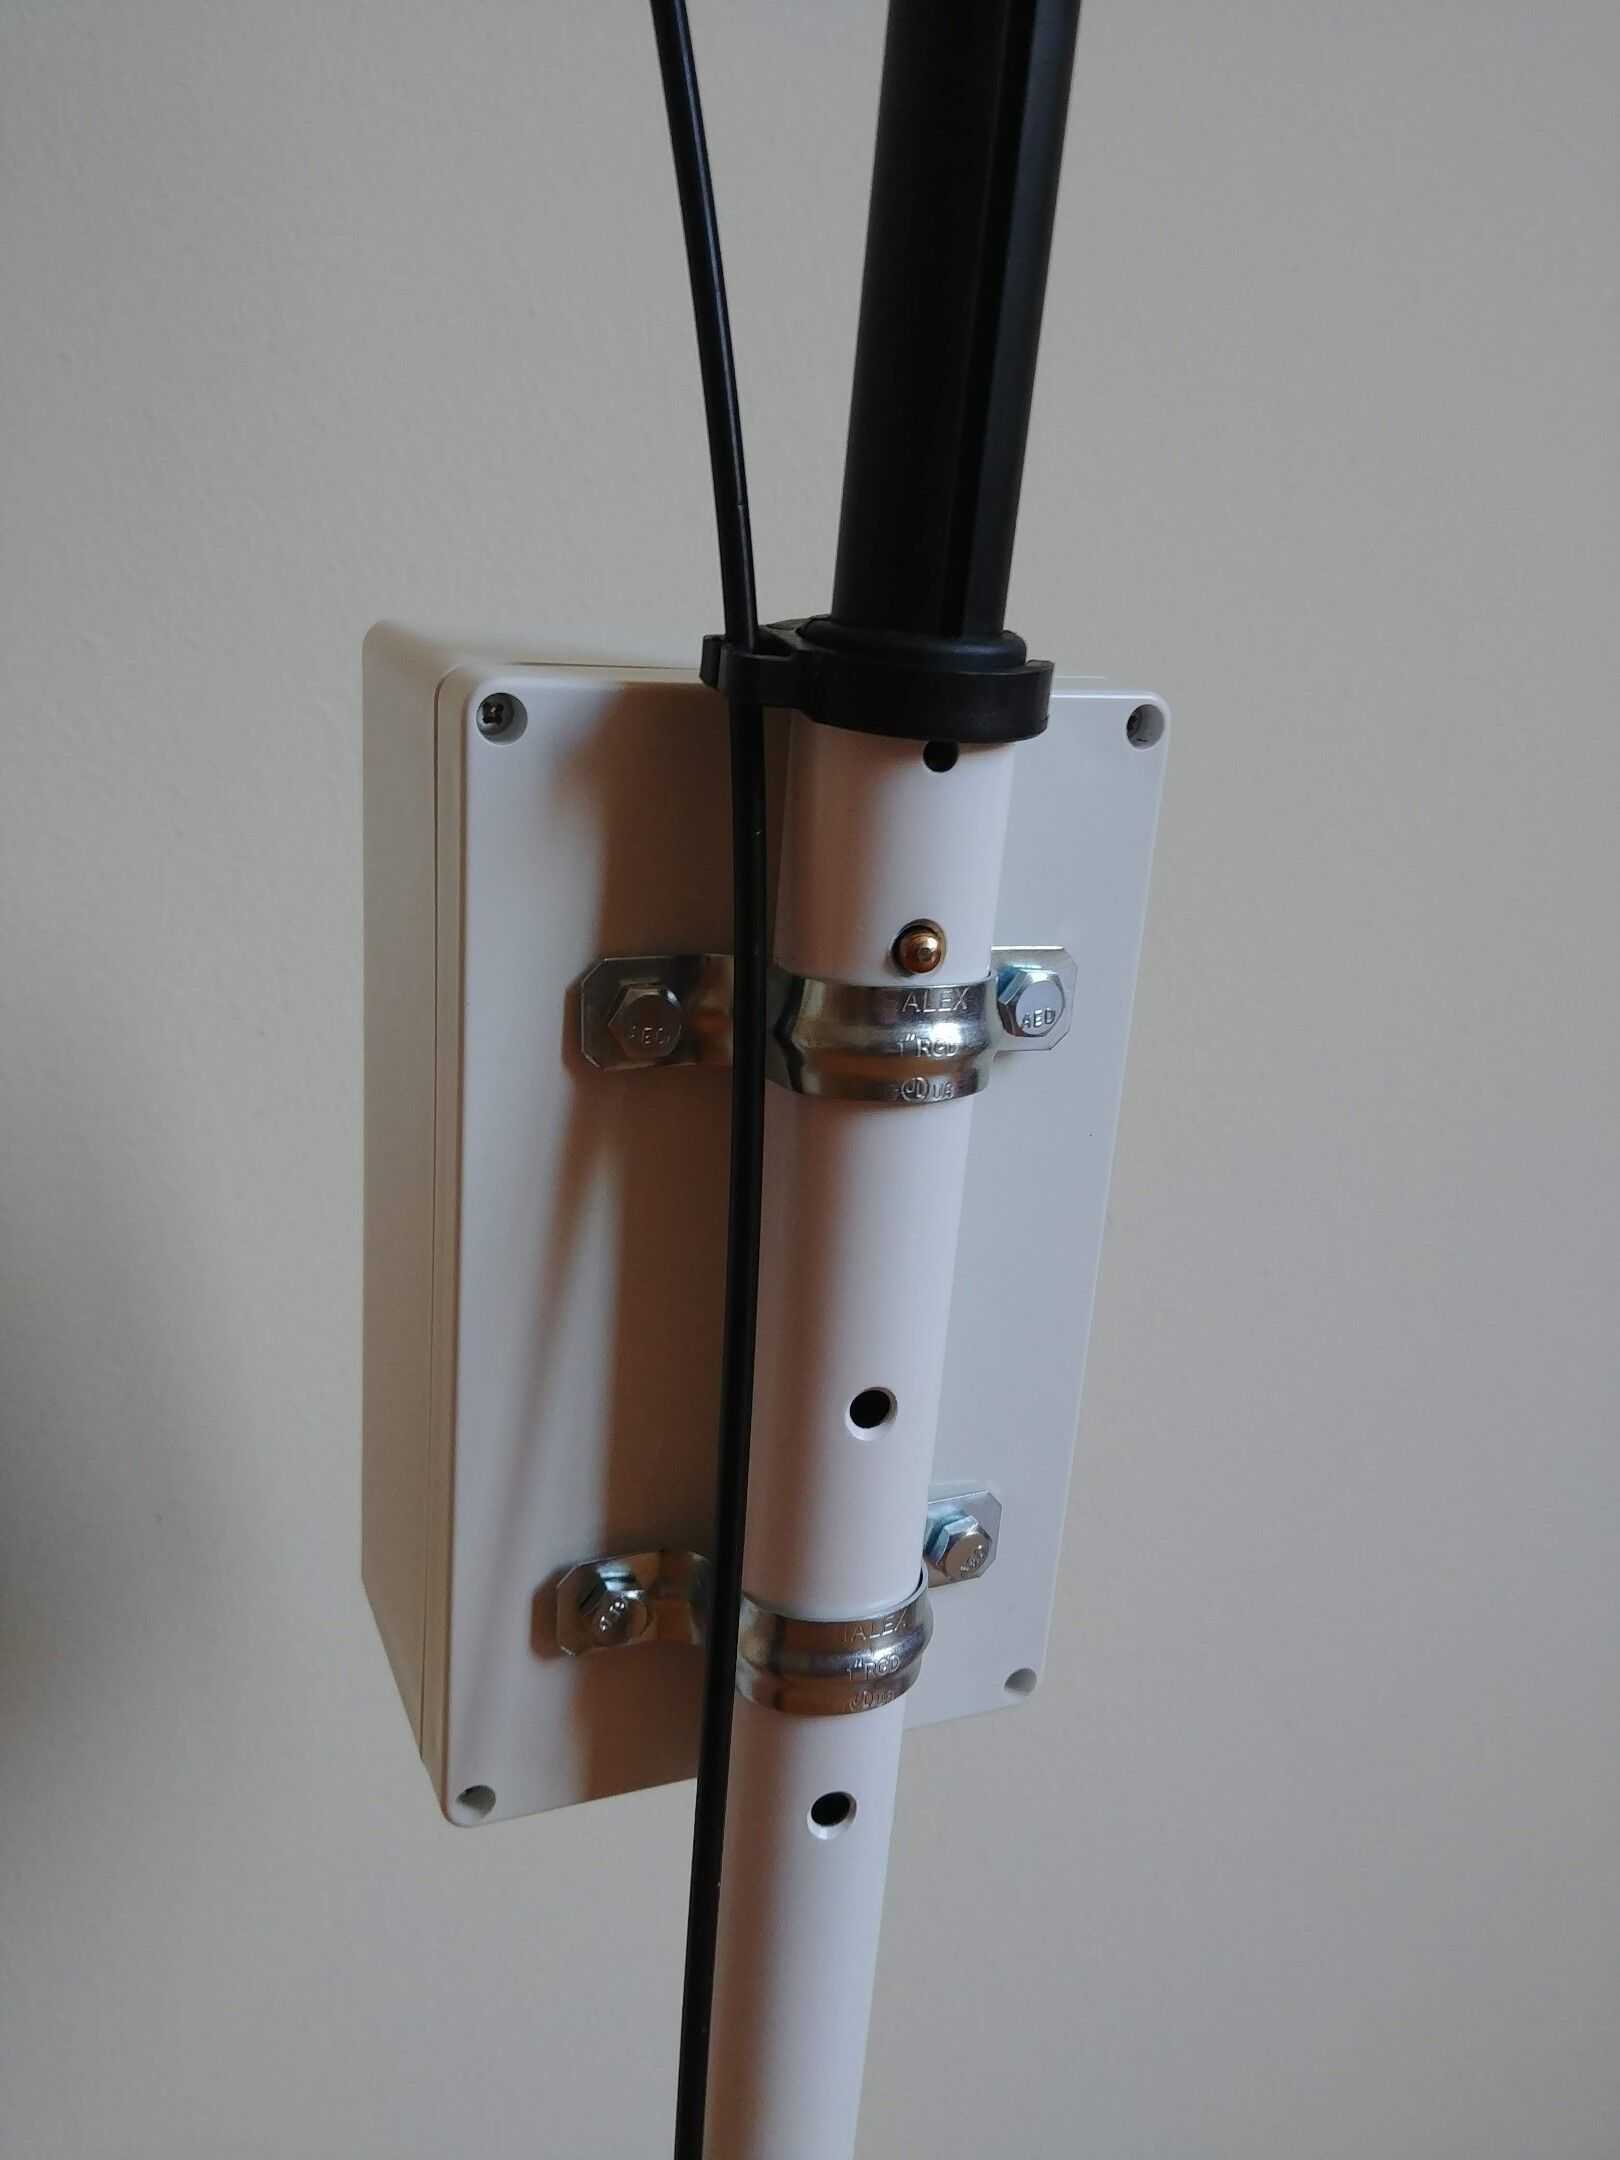
A water proof plastic project box and mounting hardware.
- Mounting hardware: nuts, bolts, washers, and pipe straps. I needed to drill several holes to mount the pipe straps to the project box’s cover.

- Cheap SIM card, FreedomPop, Ting, Hologram are good options.
- esp8266 micro controller - Optional, needed for locking capability.
- Optoisolator - to isolate the scooter which runs on 5v from the the esp8266 which runs on 3.3v.
💾 Software Requirements:
- Automate app - for running a simple “app” on our phone.
- Arduino IDE- for programming our esp8266.
📱 Setup Cell Phone:
For my SIM card, I am using a spare Freedom Pop SIM. Freedom pop offers limited data plans, some which are free if you do not go over your data cap. Since my scooter’s cell phone will use very little data, I shouldn’t have a problem staying within FreedomPop’s free tier.
The first step I took was to reset the phone, so that it does not contain any personal data. I also created a throwaway email account for my scooter, because I needed an email address to be able to download apps from the play store. For tracking, I used google’s built in find my phone feature.
The next step is to install the Automate app, this app allows to you to create “programs” (they are called flows in the app) to automate different features of your phone. Using Automate’s visual flowchart interface, I made a simple flow that will handle the logic for my scooter, you can find a copy of the flow here
The flow’s logic works as such:
-
When it detects movement via the phone’s accelerometer:
- The phone sends a http request to my scooterCheckSelf endpoint, to check to see if the scooter has been checked out.
-
My endpoint responds with true or false, letting our phone know if the scooter has been checked out.
-
If the scooter has not been checked out,
- Turn on alarm and send http request to esp8266 to lock the throttle.
-
If the scooter is checked out,
- Send http request to esp8266 to unlock the throttle.
-
Program esp8266
The phone and esp8266 will communicate via an Ad-hoc WiFi network. The esp8266 will act as an access point which the phone will connect to. Also the esp8266 will serve up a simple web server with which the phone will be able to send requests to.
To setup the esp8266:
- Download and install Arduino IDE
- Flash custom scooter controller firmware onto esp8266
The scooter controller firmware’s logic works as such:
- Creates an ad-hoc wifi network, that the cell phone will connect to.
- Prints it’s ip address to it’s serial port.
-
Creates a simple web server with two endpoints.
http://{esp8266’s IP address}/on— send high power to pin SD3 (known as pin 10 in code)http://{esp8266’s IP address}/off— send low power to pin SD3
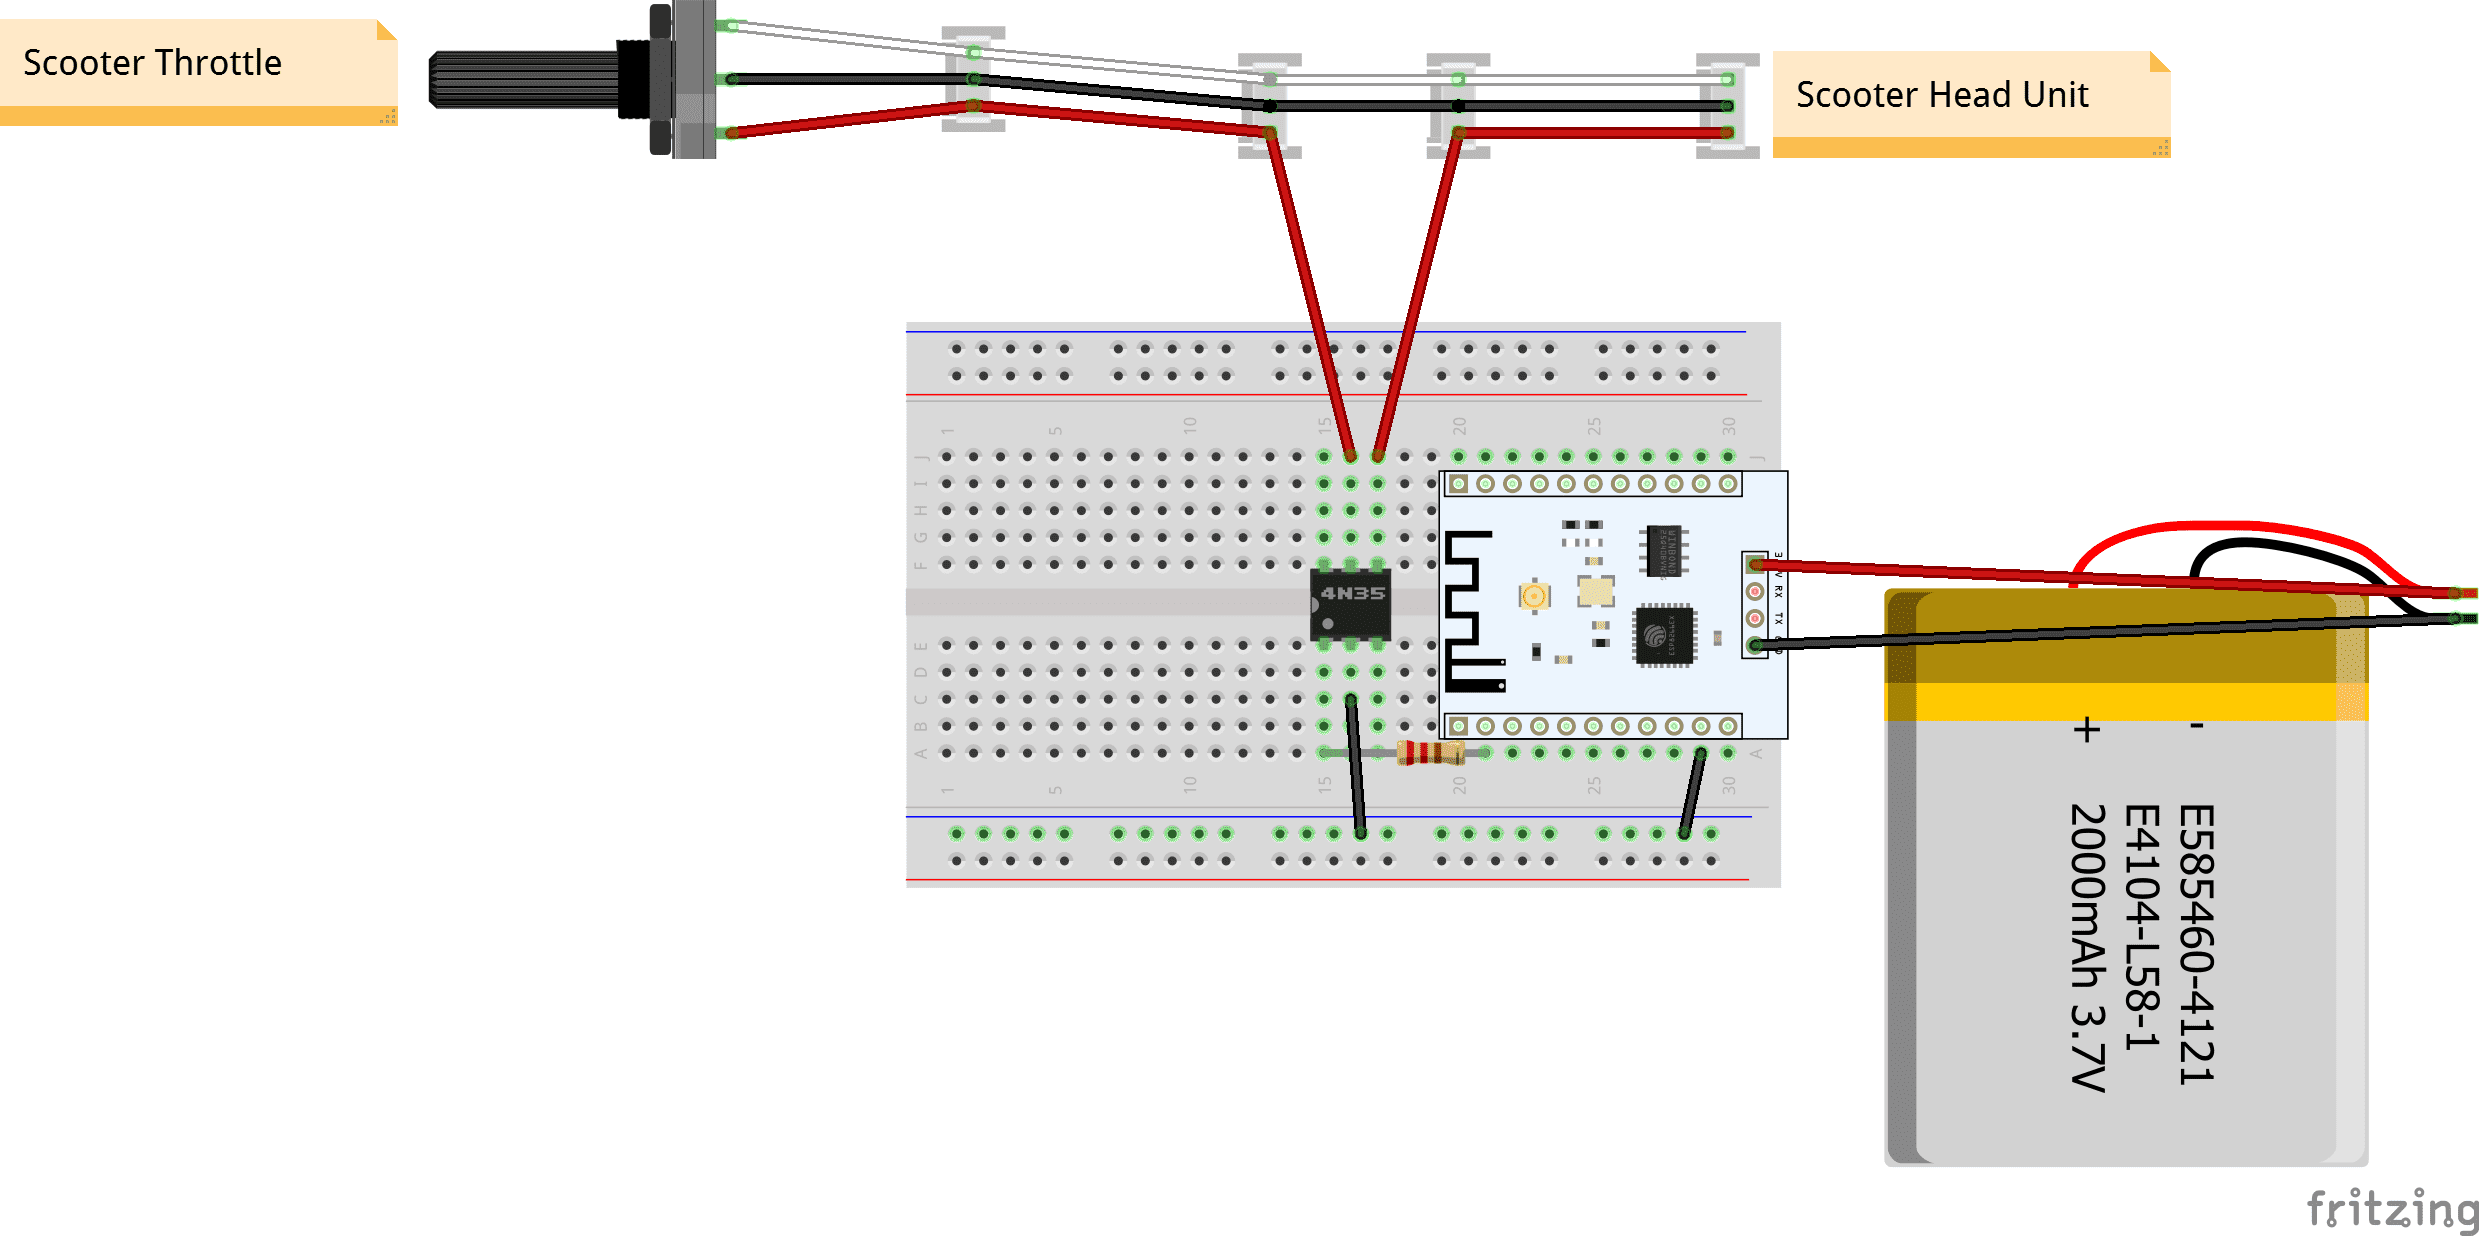
🔌 Wiring Diagram
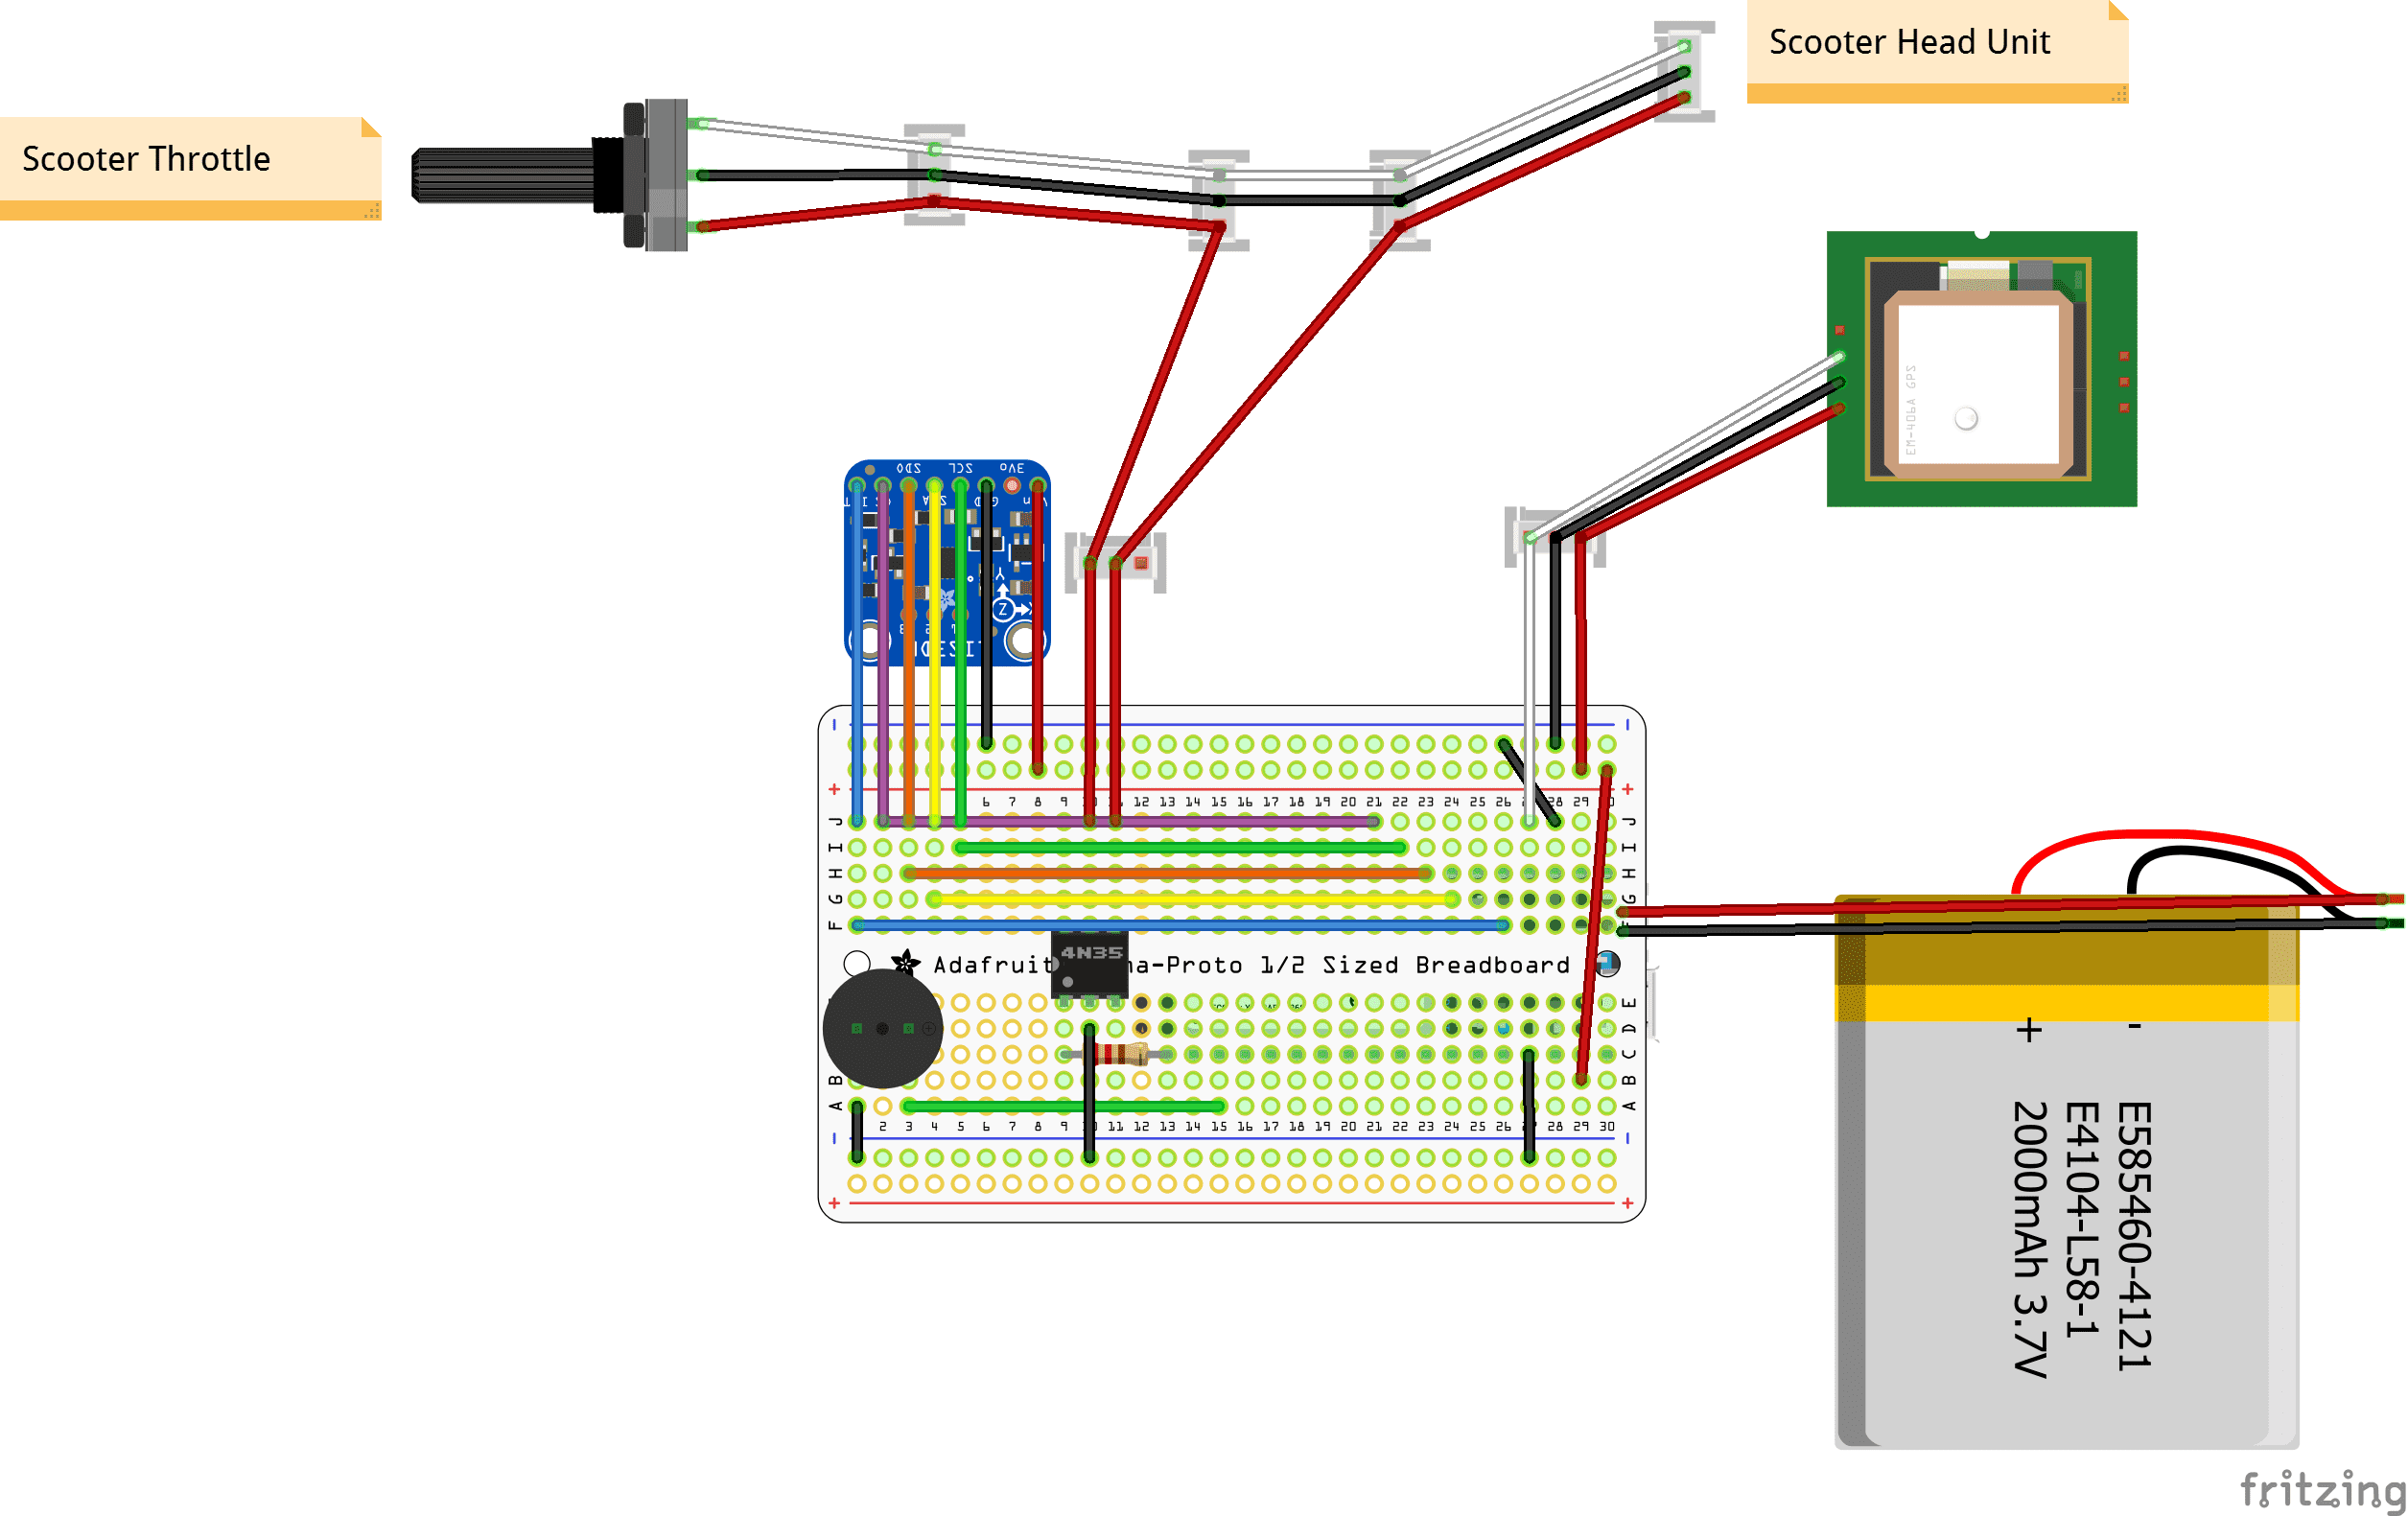
The actual model of esp8266 I used differs from the one in the diagram, so pin layout may vary. The 4n35 optoisolator needs a 470 Ohm resistor connected pin 1, the other side of the optoisolator interrupts the positive wire from the scooter’s head unit to the scooter’s throttle.
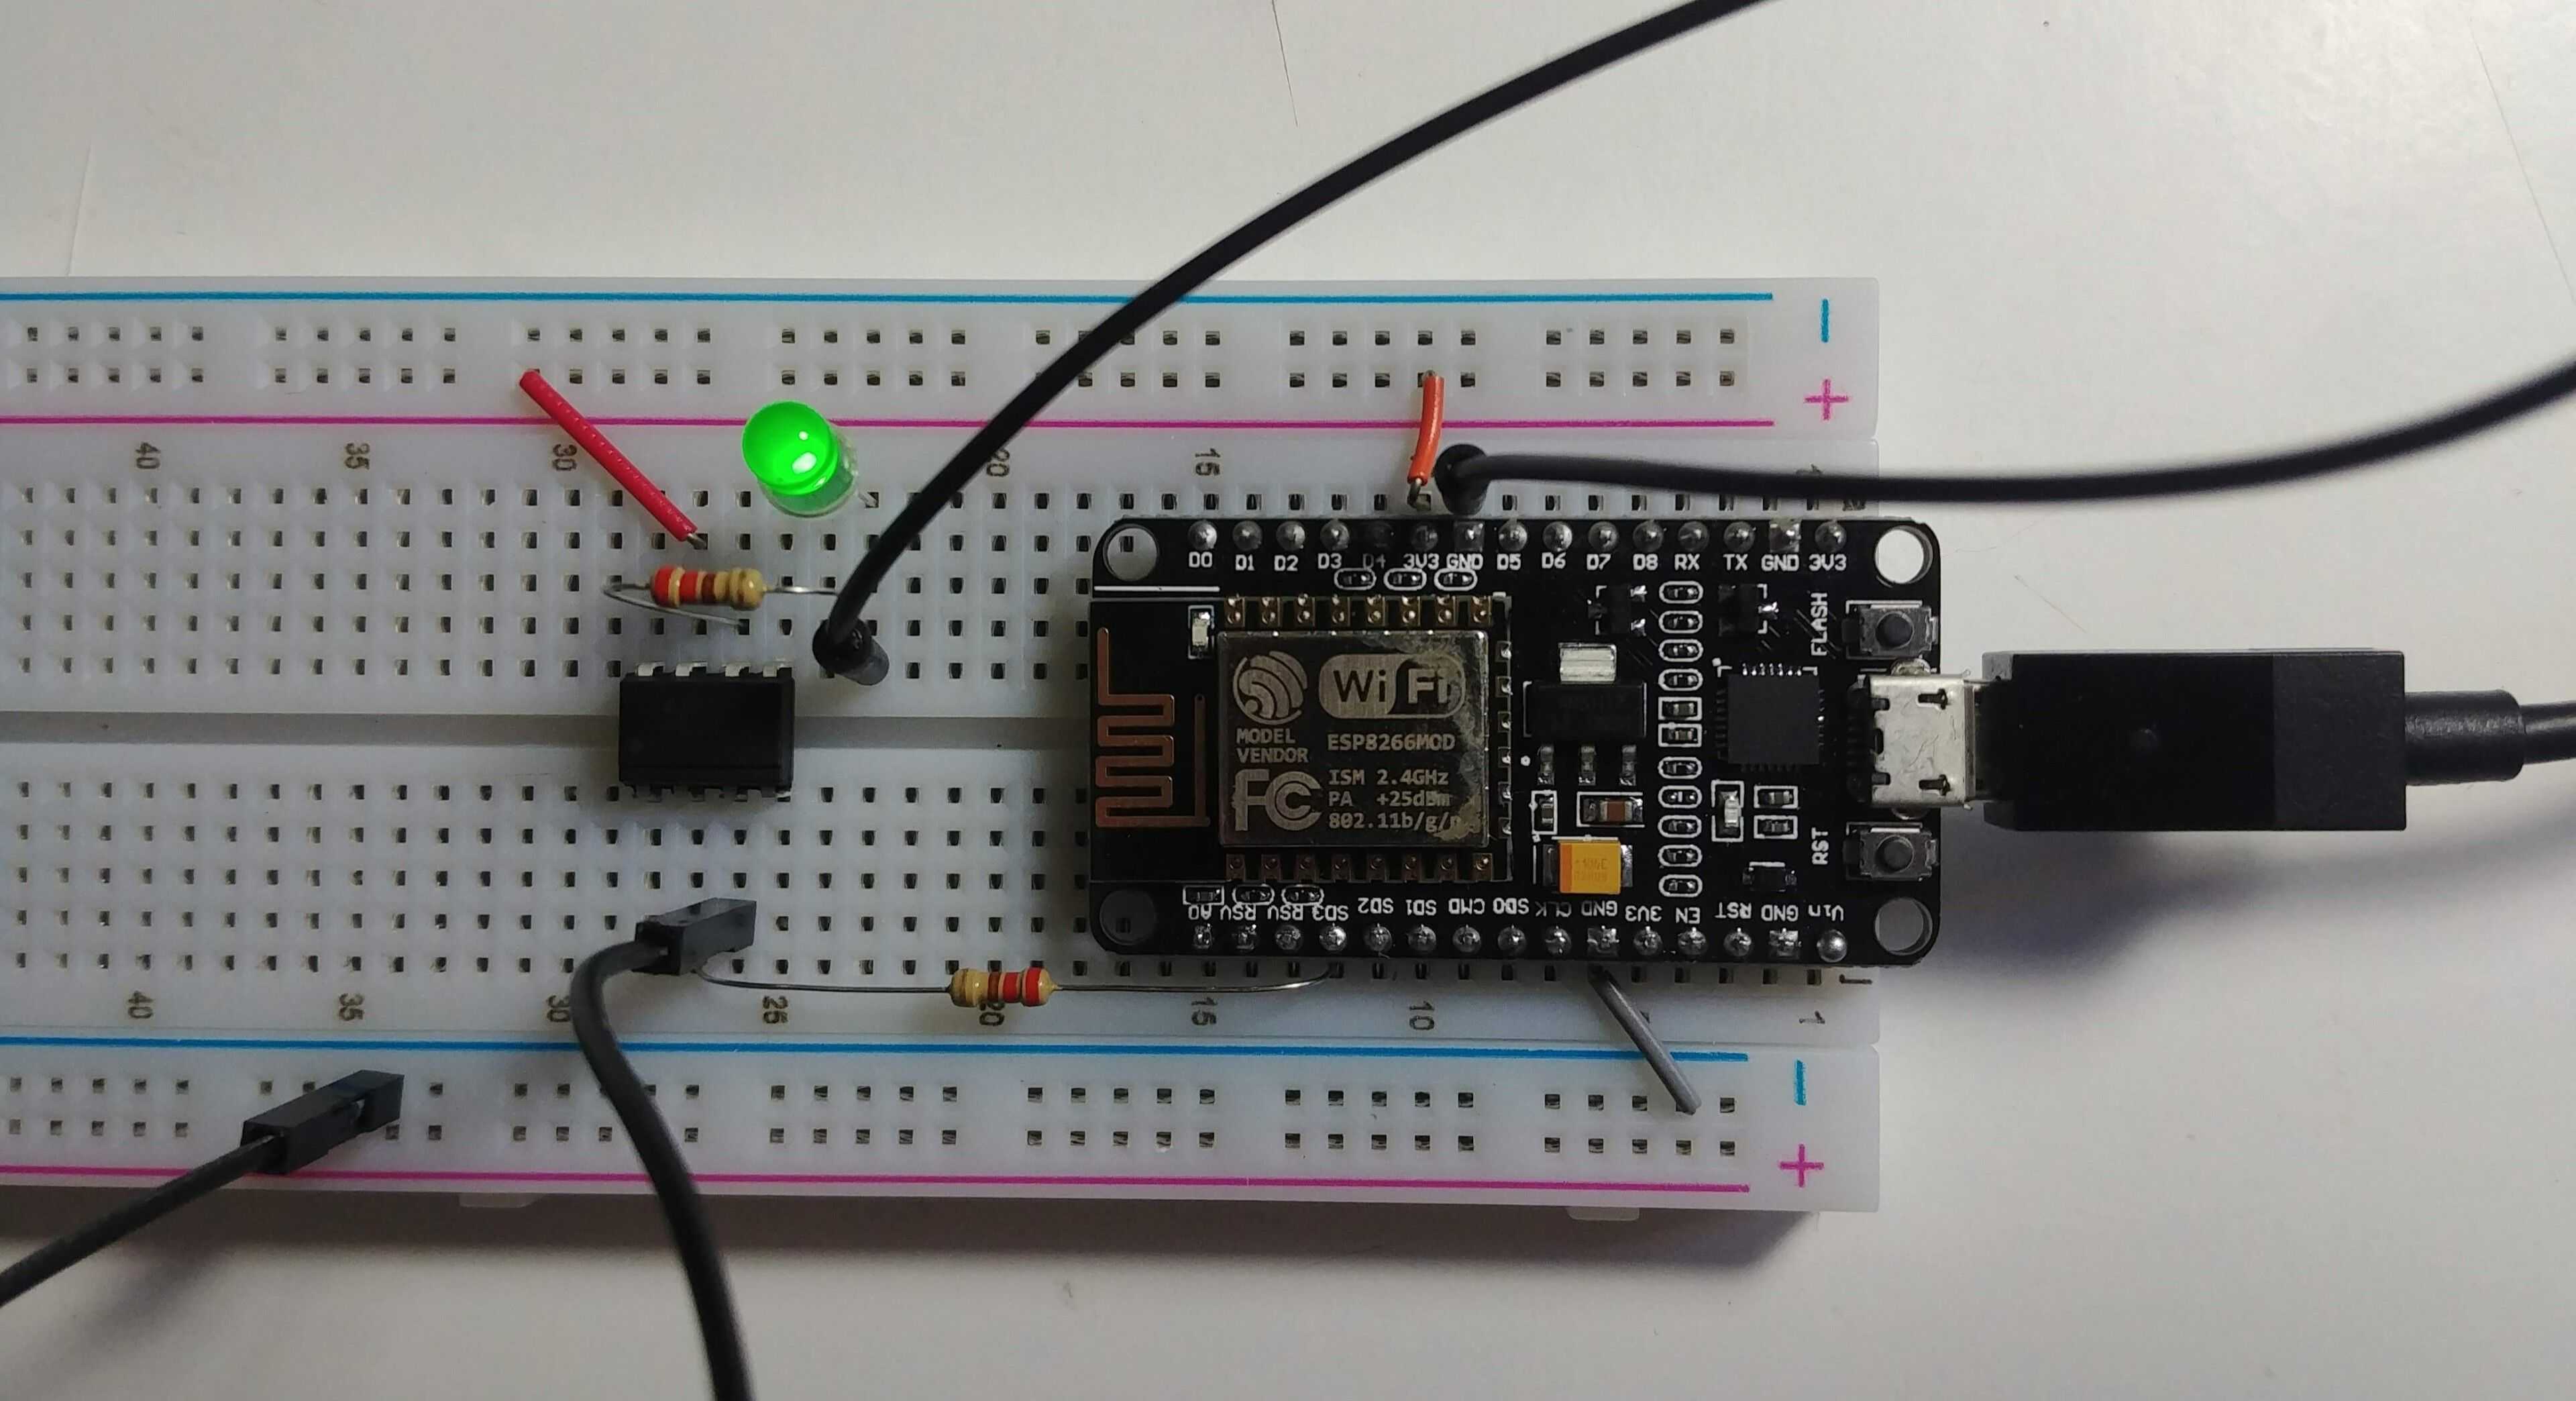
🍞 Bread Board Test
You can consider the LED as a stand in for the throttle in this setup. Since the LED is on, the scooter would be unlocked.
Mount Box to Scooter
The scooter in the photos is a cheap kick scooter for testing purposes. To test the throttle locking function I would need use an electric scooter, and I would need to route wires from the scooter’s head unit and throttle. Both the phone and esp8266 test rig are inside of the box.
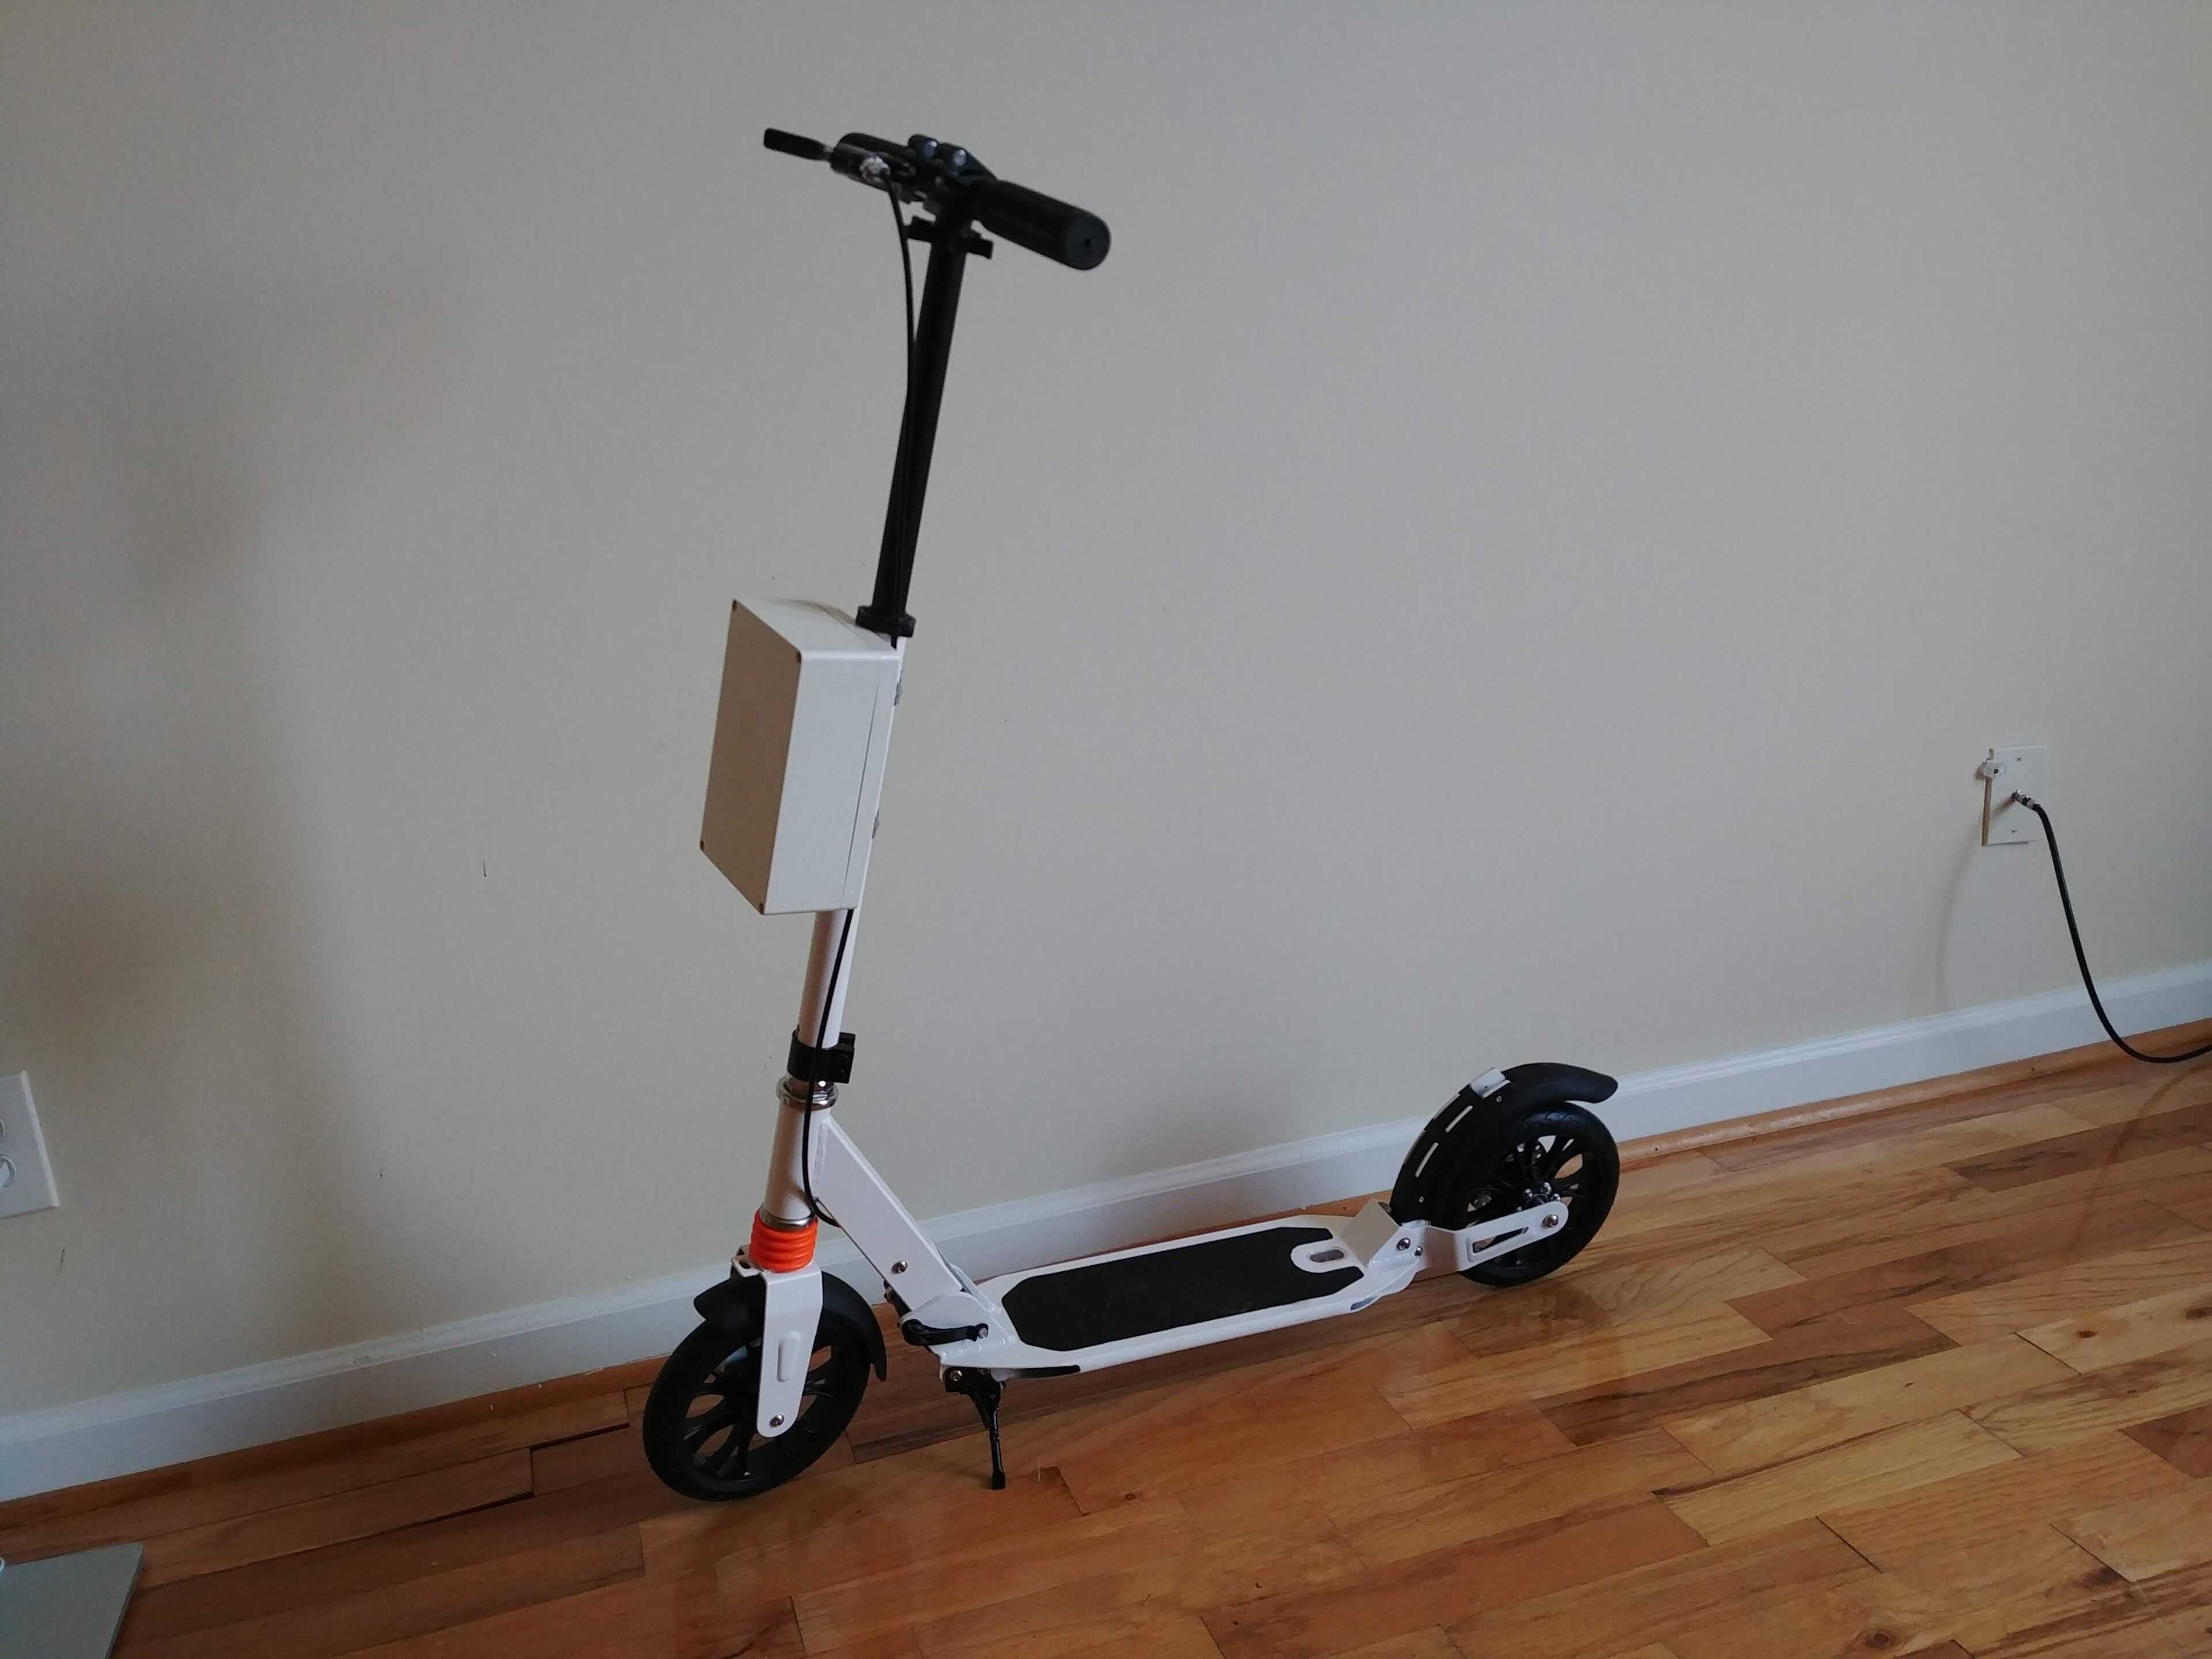
The project box is comically large because it is needed to hold my large phone. A smaller phone would be a better choice.
The minimal effort option does work, I was able to get it to detect motion, control the alarm, lock status, and communicate with my API. Not a bad result for a mostly broken phone and a $5 micro controller. However I didn’t bother thoroughly testing this solution. I assume that I would have issues with battery life, managing sleep states and software stability. This option was a fun experiment in seeing how far I could go, without out putting much effort into the setup
The Embedded Option
For the embedded option, I made a video (coming soon) explaining how I put it together. The material below is written as supplementary material for the video, rather than an overview.
Using off the shelf components, I will be putting together a custom device purpose built to work with my application. The embedded option is attempt to create a solution that would be somewhat plausible to deploy to actual customers. However there are certainly a lot of improvements that could be made.
Pros:
- Over the air updates - via Particle cloud service.
- More predictable results, no unnecessary software running on our device.
- More customizable actions.
- Battery should last a lot longer.
- Better Tracking
- More compact than minimal option.
Cons:
- More complicated assembly.
- Particle has a monthly cost.
Parts List:
- GPS Receiver - GP-20U7
- Buzzer
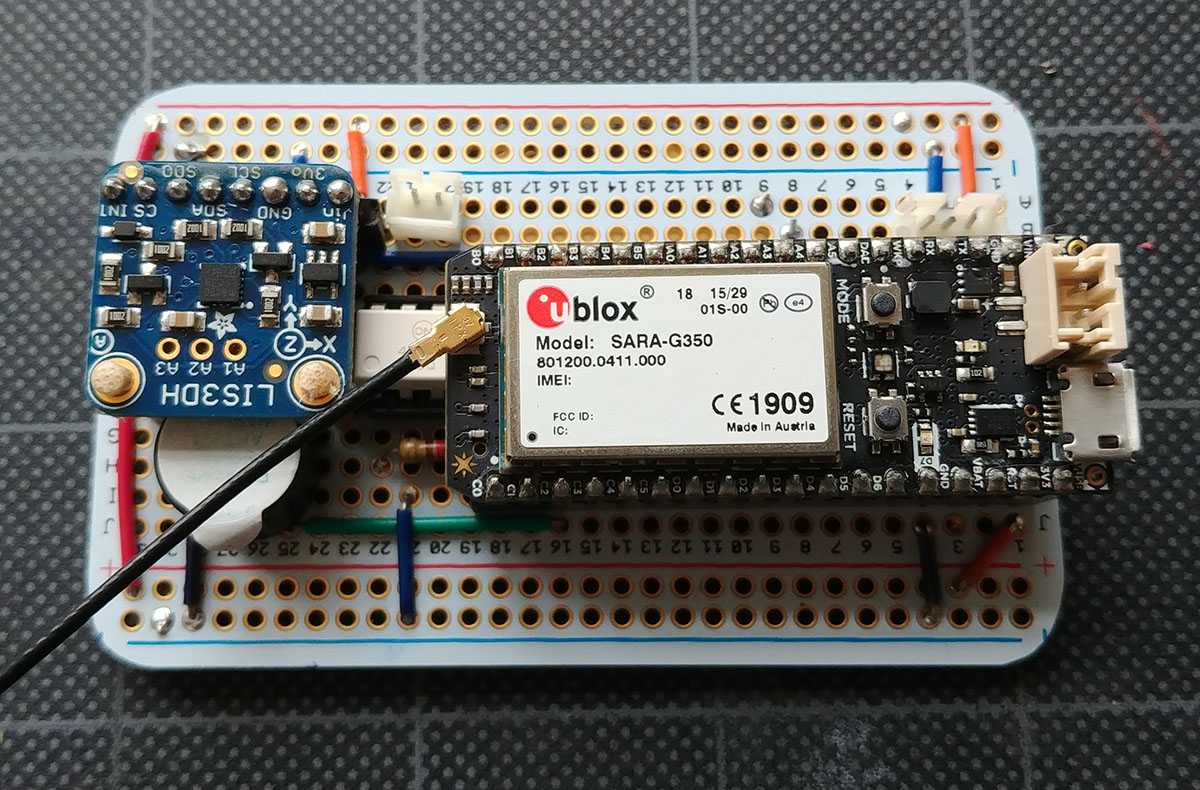
- Particle Electron
- JST-SM Connectors
- Waterproof Connectors
- Waterproof Enclosure
- Optoisolator
- LIS3DH Triple-Axis Accelerometer
- Perma-Proto Half-sized Breadboard
- Female Pin Headers
- Typical electronics supplies: resistors, wire, solder, connectors
💿 Software List
Particle Firmware Flow
Main Loop:
- Check if battery status is below 10%, if so perma-lock scooter
-
Check if scooter has been has been unlocked longer than the ride time limit.
- If so, lock scooter.
- Gather GPS data
-
Check for movement,
- If movement occurred, and scooter is locked, sound alarm.
- Run google locator function, cell and wifi tracking.
🔌 Wiring Diagram
The particle electron is hidden to show the wiring.
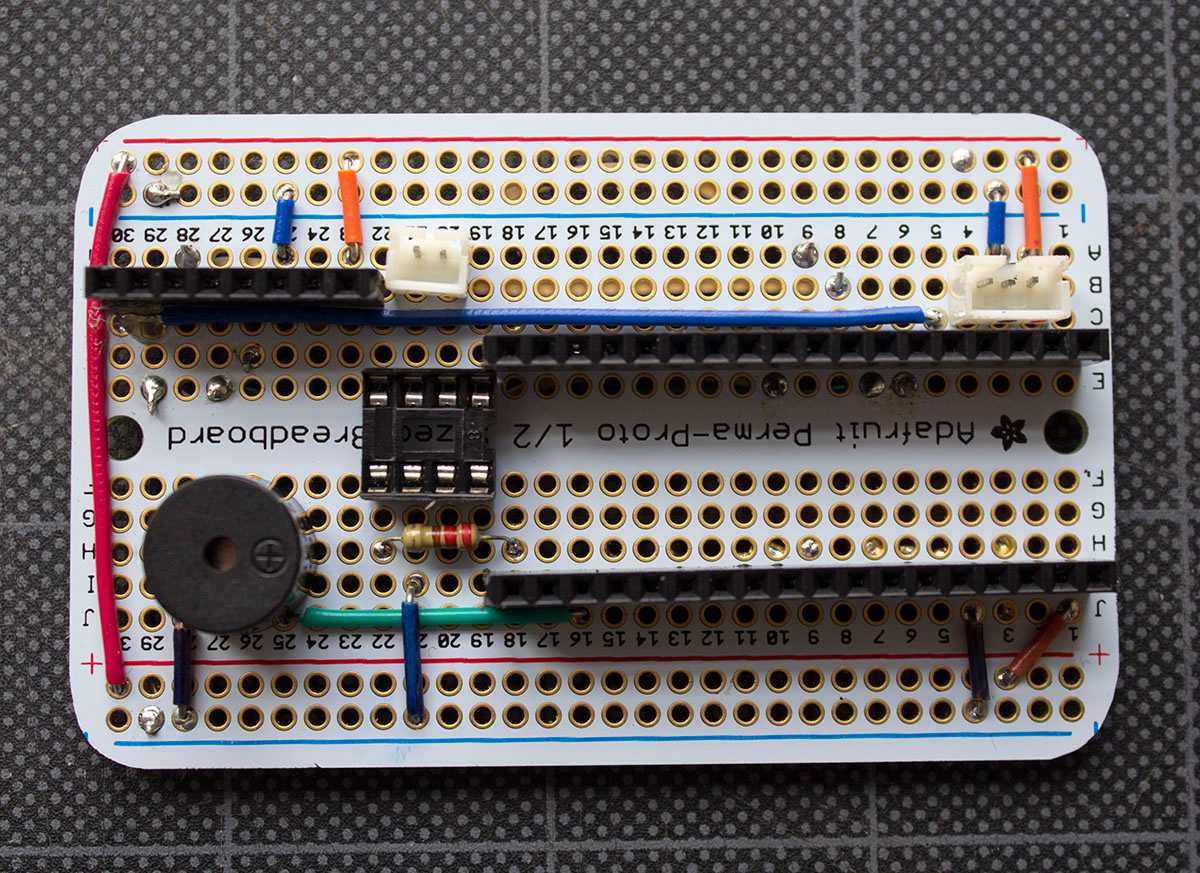
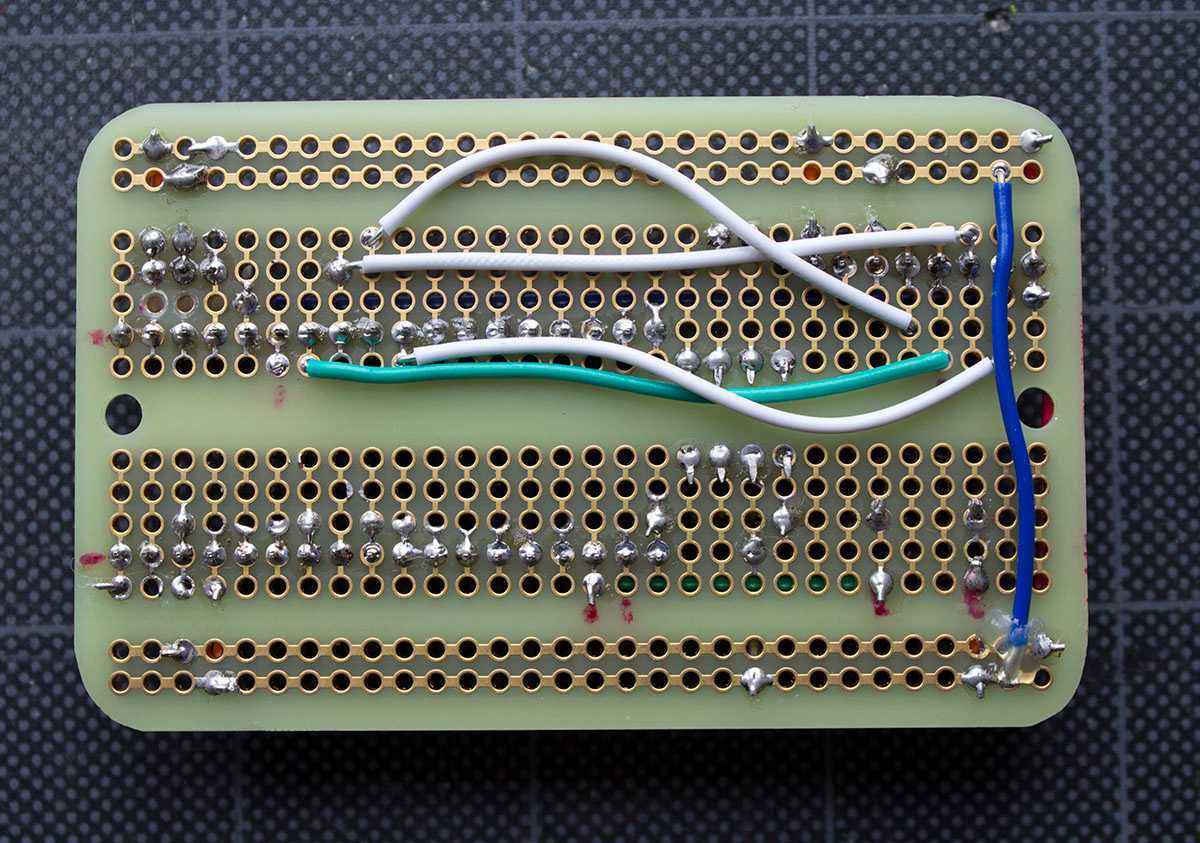
✔️ Photos of completed device:
I cut the traces on the bottom of the board for:
- Row 2 Column C
- Row 3, Column C
🏁 Done!

A blog about Creatures an open source scooter share project
Started by Joshua Sheridan